How to Make Ganache Like a Boss!
Crazy, buttery, rich, and decadent! Ganache is that magic candy filling that turns simple chocolate into ecstasy. It’s at the center of your favorite bon bon and nestled within the pillowy layers of wedding cakes.
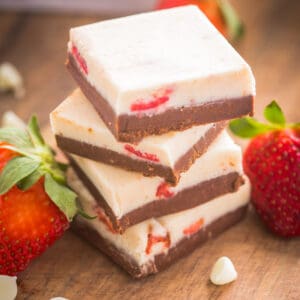
Starting from dark, milk, or white chocolate and just a little creativity, one can forge several flavors into a culinary masterpiece. As far as I’m concerned, ganache is chocolate perfection!
What is ganache exactly? I’m glad you asked. Ganache is an emulsion of chocolate and cream. Like oil and water or vinegar, chocolate and cream though perfect for each other don’t like to play together. Ganache happens when you get the cream particles to suspend within the chocolate or, rather, the cocoa butter particles. It is so wonderful that I want to bust out with my own rendition of Ebony and Ivory! …The SNL Murphy and Piscapo (click here for amusement) version of course!
Below I’ve adapted Valhrona’s master ganache recipe for home use. Using this recipe and a little creative flavoring, you will be well on your way to amazing everyone with your own hand crafted chocolate truffles, cakes, and many other delicious treats with your ganache taking center stage. In a few easy steps, I’ll show you how the professional chocolatiers make those magnificent truffles filled with passion. Grab your apron. Let’s get started!
What you’ll need…
TOOLS:
- Microwave safe Mixing bowl or Bain Marie (double boiler)
- Rubber spatula or wooden spoon for stirring
- Candy thermometer
- Sieve or cheese cloth
- Scale
- Measuring cups and spoons
- Immersion blender (optional but recommended)
INGREDIENTS:
- 1LB Dark Couverture Chocolate in morsels or chopped for easier melting
- 1C Heavy whipping cream
- 1-2T Invert sugar
Important note: A simple rule of thumb to keep in mind is that white chocolate is double the weight of the cream. Dark chocolate should be 1 to 1 in proportion and milk chocolate 1.5X to cream.
Once you’ve gotten your tools and ingredients together, the first step will be infusing the cream with your flavors. If you are not using extracts or oil soluble flavorings, this can be done by two different methods; hot or cold infusion. I explain more about each method in Infusing Flavors. If you are using flavor extracts or oils, it is easier to add the extract to the cream. Just reduce the cream amount in proportion to what you are adding. A few drops of flavoring or food grade essential oil to the chocolate while it is melting should not effect the other proportions.
If you choose to infuse your cream with solids that will be removed after infusion, these solids will soak up some of the cream. Press down firmly with a ladle or spoon to squeeze as much of the cream out as possible when using a sieve. If using cheese cloth, wring out by hand.
Next, add the invert sugar to the cream and bring the cream mixture up to 105°F(40.5°C) in a small sauce pan or a microwave safe bowl and your chocolate up to 94°F(34.4°C). This can quickly be done by microwaving the chocolate in a metal bowl on 1/2 power for 10-15 second intervals and stirring after each time.
Don’t worry about metal in the microwave so long as there are no jagged edges on your bowl and it does not touch the walls inside the machine. Just be sure to stir well after each interval so the chocolate at the bottom does not get scalded or burnt.
You’ll notice that we aren’t simply throwing these ingredients together and bringing them to a boil. That method will also give you an emulsion but can potentially effect your flavors which you have taken so much care to create. Trust me. You and those you choose to share this with will taste the extra care you put into your ganache.
94°F is the optimal temperature to emulsify cocoa butter with other liquids. This is what you’re attempting to create, an emulsion. Suspending a liquid, the cream, in a fat, cocoa butter. Normally, chocolate and liquids do not play nice together. So, let’s keep a close watch on your temps.
Once your cream is warm and chocolate melted, and both are at or just above 94°F, begin gradually adding the cream to the chocolate a little at a time and begin stirring with a lot of friction. The friction is key for a good emulsification.
The chocolate will go through a few stages and will at moments look like it is fighting the process. Keep stirring in a little cream at a time and watching your temperatures. The mixture will begin to seize and even look broken. If your chocolate dips below 84°F(28.9°C), do not add any more cream. Just zap it again in the microwave and keep going when it is back up to temp.
This process should take around 15-20 minutes to complete and shouldn’t be rushed. Eventually, your ganache will loosen hand have a rich smooth consistency.
You can move on from here, if you wish but I take one more little extra step at this stage. If you have an immersion (or stick) blender, use it once your cream has been fully incorporated into the chocolate. The immersion blender will further emulsify the mixture and help keep it stable for longer. When inserting the blades of the blender into the ganache, it is very important to remember to burp the blender. Tip it to the side so as the blades goin into the chocolate, no air is trapped with it. Oxygen will shorten the shelf life of the ganache and great effort should be made not to incorporate any in while performing this step. Then, just buzz away while keeping the head of the blender fully submerged the entire time.
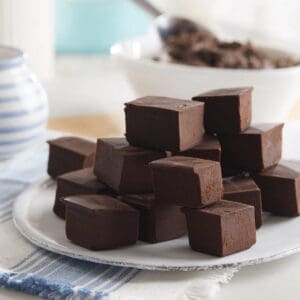
All that is left to do is to give it time for the crystals to form and your ganache to set. You can pour it out into a wide pan for slabbing later. Slabbing is when you let your candy form a wide thin “slab” and cut squares, triangles, or other flat shapes out once it is set.
You could pour your ganache into molds or allow to set and scoop out your individual portions. I have a very small ice cream style scooper which I can create uniform hemispheres or pop out into my hand and roll into round balls. Your body temp will transfer to the ganache and soften it a bit. Try to handle them as little as necessary. You can place them in the fridge for a couple minutes to harden again, but do not enrobe in couverture until they have been out and brought back to room temperature. Ganache, like any other substance will shrink or expand at different temps. Expanding ganache may cause your enrobed truffles to crack.
Give it time. There many factors which contribute to the time required for ganache to fully set. The optimal temp is around 60°F. A cool dry place like your pantry will do. Don’t be alarmed if it is still a bit loose after a day. Some ganache, white chocolate especially, could take 48 hours to fully set.
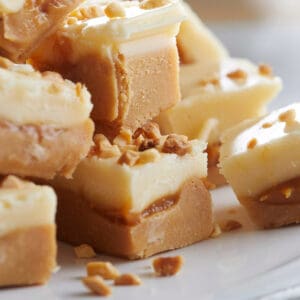
Once you have formed your balls, hemispheres, or squares; the only thing left to do is enrobe your truffles. Enrobing your ganache will further extend the shelf life and add one more dimension to the truffle. This can be done by rolling your ganache (easier if in ball form) around in cocoa powder, sprinkles, or chopped nuts. These options will allow your ganache to expand or contract if coming out of the fridge. If a glossy hard chocolate shell is what you’re after, you can enrobe your new ganache in curvature which will lock in the flavor and moisture longer
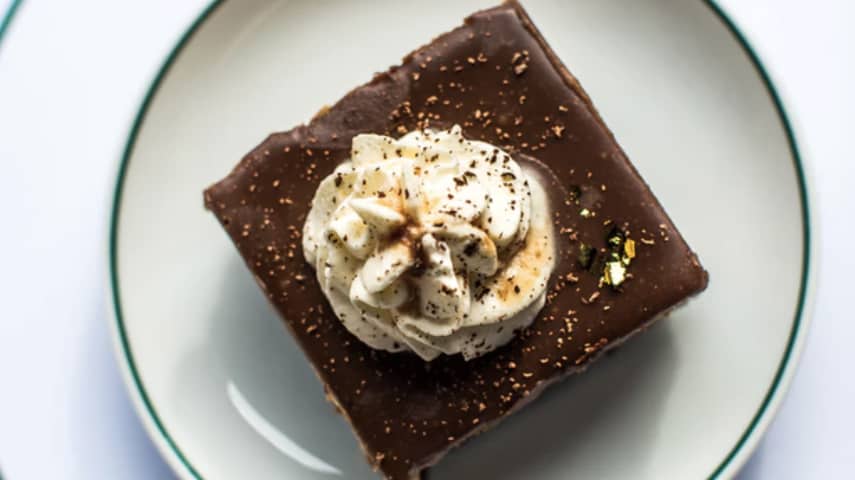
However, there are any number of things you can do with fresh ganache such as covering in cookies, brownies, or cakes; adding to ice cream or milk shakes. .or, eating right out of the bowl while you decide what to do with the rest.…
Let me know how yours turns out in the comments below!

Extra Ordinary Delights